Cloud Management
Ioto can be service local management applications via the integrated embedded web server or it support cloud-based management apps via the integration with the Ioto cloud service that provides a complete end-to-end cloud-based device management solution.
Enabling Cloud-based Management
Cloud based management is enabled via the ioto.json5 services.
The mqtt service enables cloud communications. The provision service enables devices to be claimed by cloud-based device managers and to be provisioned with TLS certificates for communication with the cloud service. The sync service enables transparent synchronization of device data with the cloud.
The easiest way to configure cloud-based management is to select the Manager app when building Ioto. The app will supply a configured ioto.json5 file via its ./app/NAME/config/ioto.json5 file.
The Manager app builds and configures Ioto for cloud-based management using the Device Manager.
Running Ioto
After Building Ioto run Ioto via make run:
When Ioto starts, it registers with the EmbedThis Ioto cloud service and waits to be claimed by a user for management.
Device Association
The process of associating a device with a user is called "Claiming" and consists of a user presenting a device claim ID that authorizes the user as the owner of the device. The unique claim ID is typically printed on the manufactured device. When evaluating Ioto, the Ioto agent will display the claim ID to the console.
An Ioto enabled device can be claimed by any user. Once claimed, the device is associated with the user, a device manager and the underlying device cloud.
During evalution, it is easiest to use the pre-existing Builder Eval Cloud and Eval Device Manager. The Builder's Eval Cloud is a multi-tenant, shared cloud for evaluating Ioto. The Eval Manager is a developer device manager suitable for examining and managing devices and device data.
To claim the device using the Eval manager, navigate to the builder and select the Managers page.
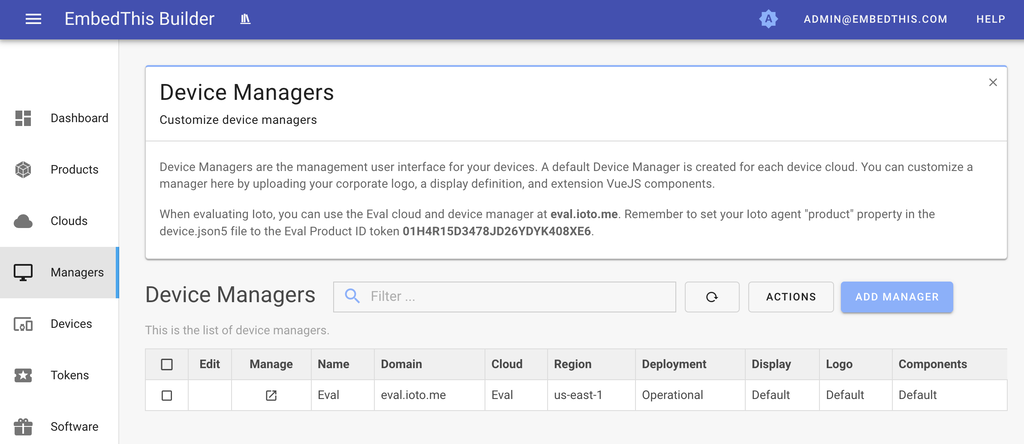
Then click the Manage icon for the Eval manager. This will launch the Device Manager.
Manager Login
When you log into the Device Manager, you are logging in as a device user. This is a different account to your Builder login account. Device Manager logins are unique for each device cloud.
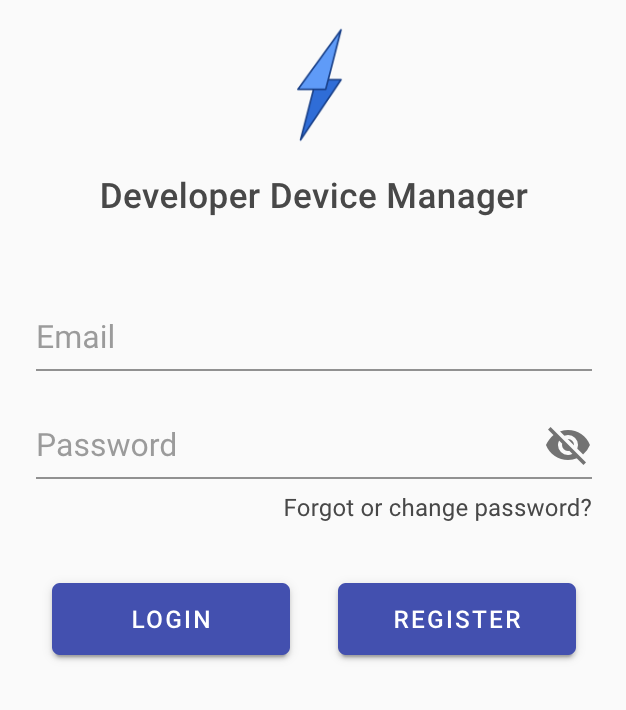
Enter your desired username and password and click Register. You will be sent an email confirmation code to complete your manager login.
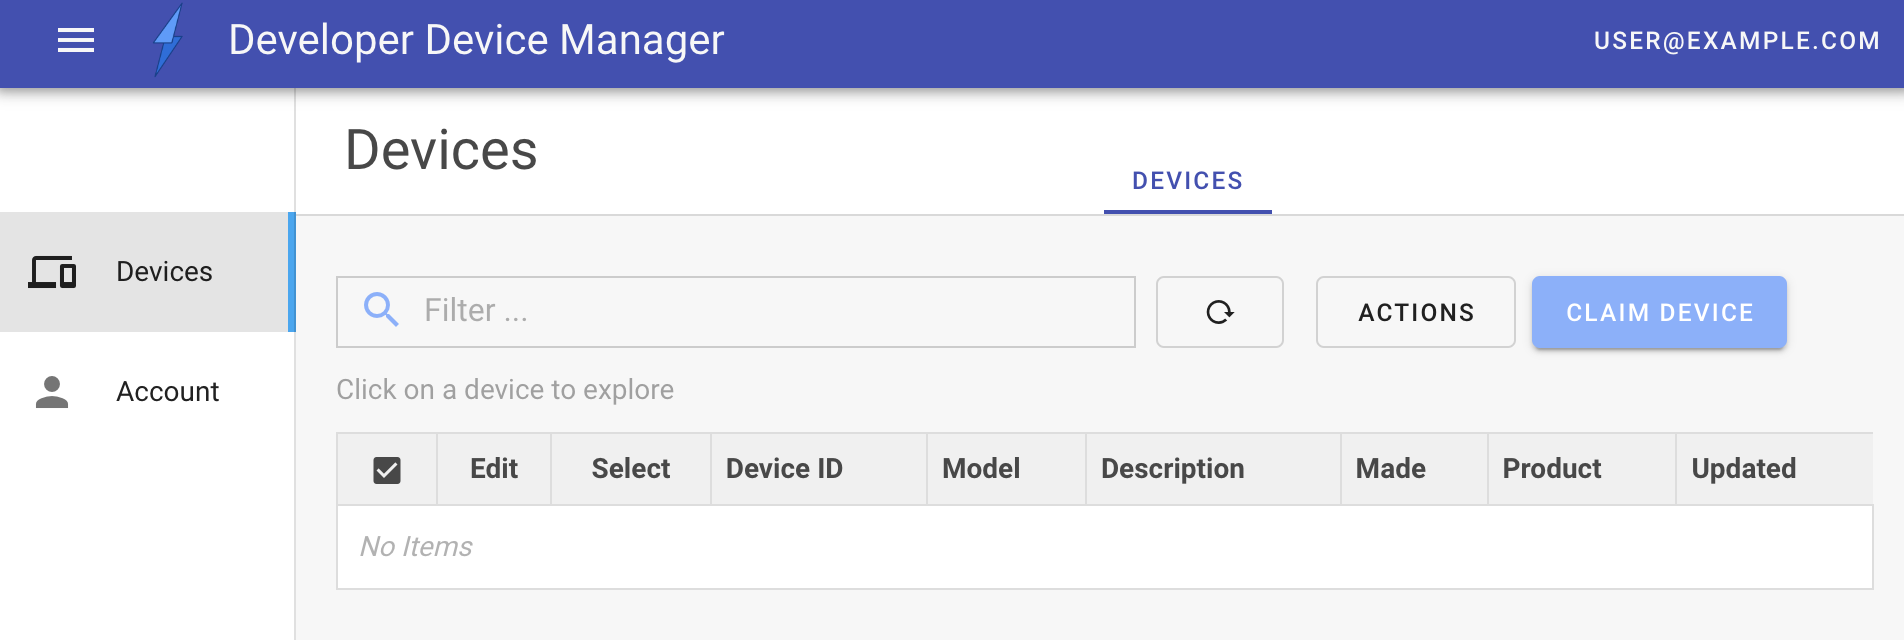
Claiming a Device
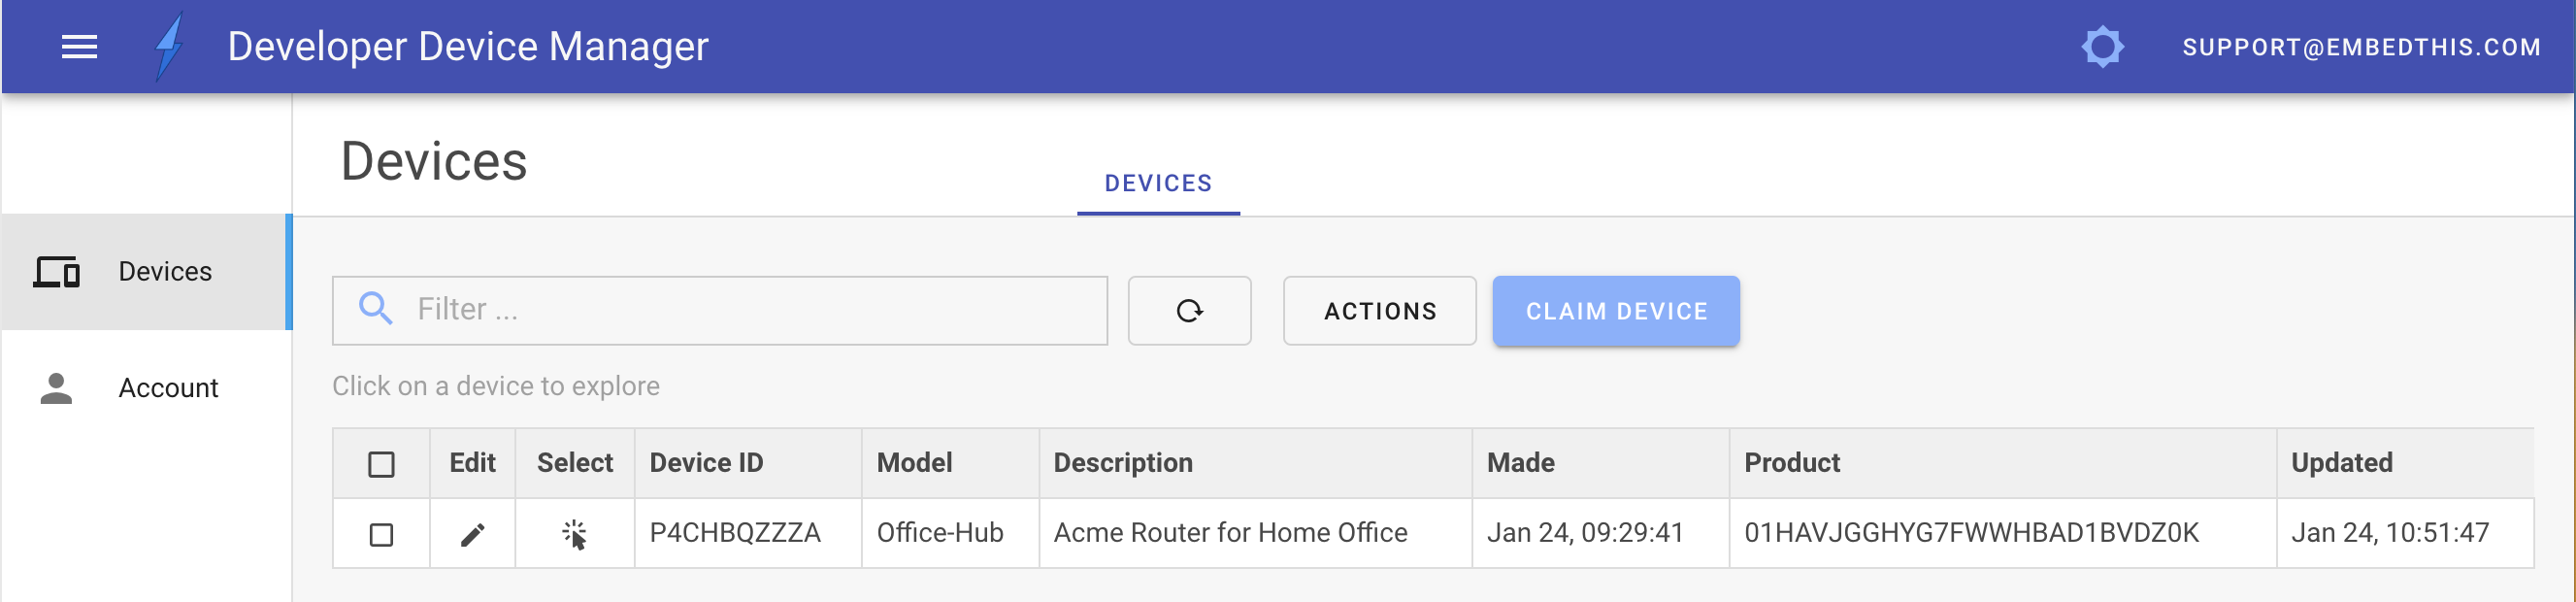
After logging in, you will see the device list, which will be initially empty. Click the Claim Device button and enter your device claim ID to claim your device for management.
The Claim ID is the unique device ID displayed by Ioto when run. This ID is dynamically allocated when first run, but can be initialized via the config/device.json5 configuration file. During production, a generated device claim ID is typically printed on the device packaging and device label.
Read more in the Builder Claiming Devices documentation.
While an Ioto-enabled device is waiting to be claimed, Ioto will periodically check with the cloud service to see if it has been claimed.
Once the device is claimed via the Manager, Ioto will display:
When claimed, the Ioto agent will be provisioned with a unique device certificate for secure TLS communications and will connect to the cloud using the MQTT protocol. These will be saved under the ./state directory as ioto.crt and ioto.key.
Demonstration Cloud Messaging
The default Ioto configuration will run a demo routine to update a counter and send the updated value to the cloud. This counter updates every thirty seconds and can be monitored via the Device Manager.
In the Device Manager, select the claimed device from the device list.
This will then display the database tables and dashboard for this device.
Key/Value Store
The default device schema has a key/value table called the "Store". The demo counter, will update a value with the key of "counter". Click on the Store table to display the store contents.
This will display all the data items in the store for claimed devices. From here, you can modify an item by clicking the Edit icon or you can edit in place by clicking on a teal color cell and updating the value and then clicking Save.
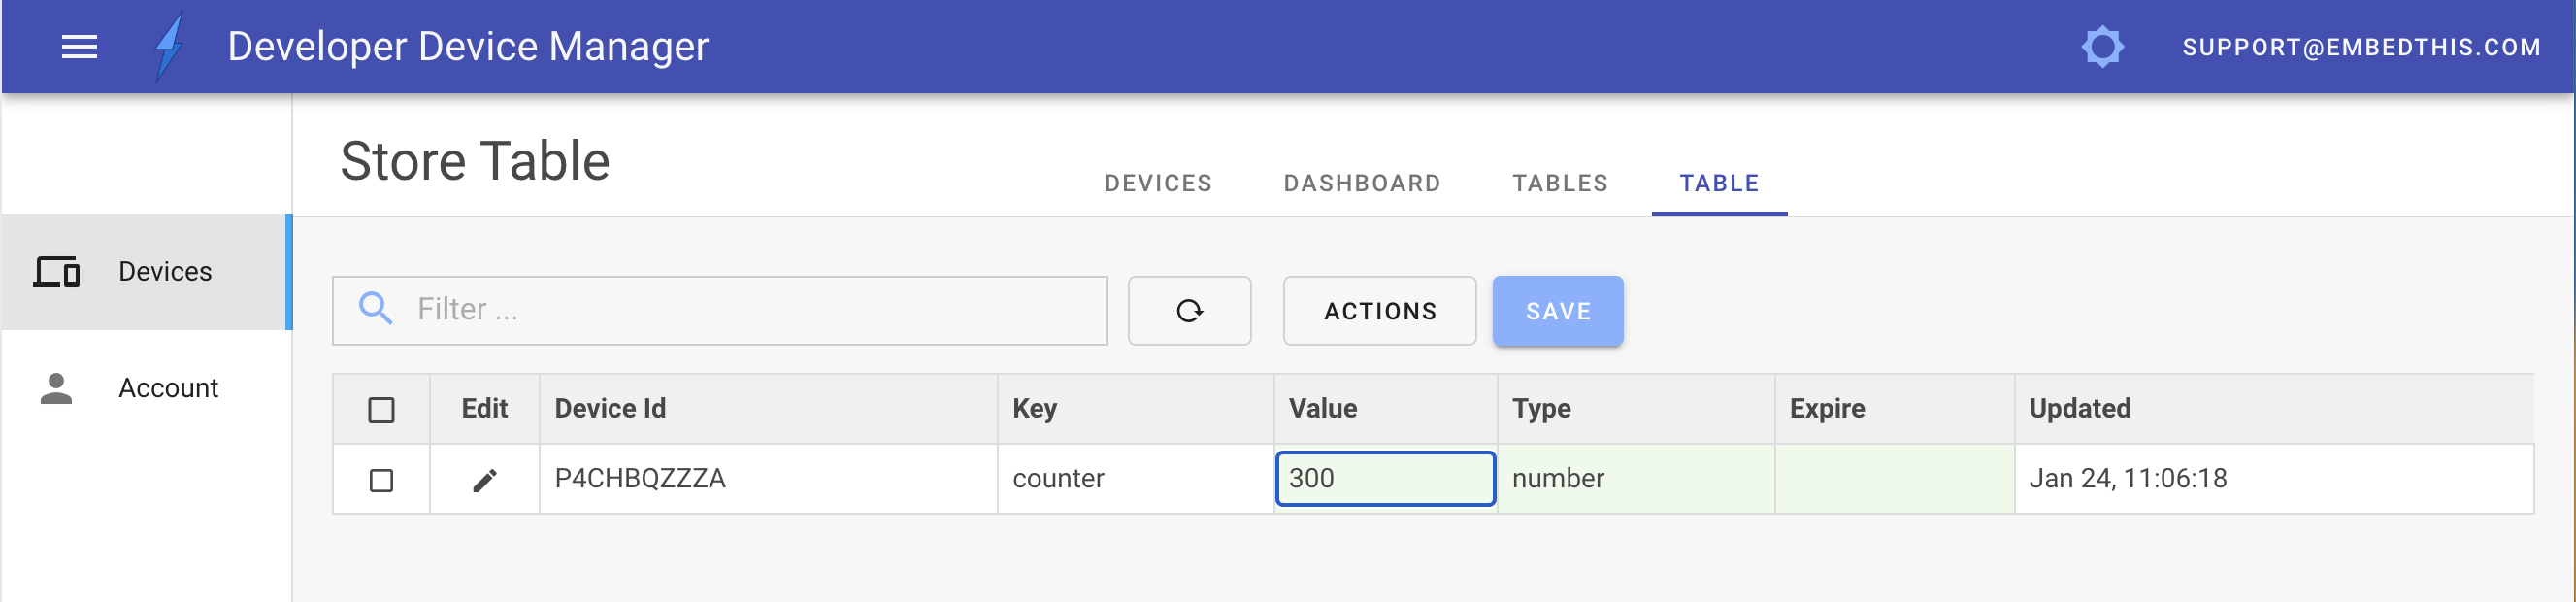
You can reload the table contents by clicking the table reload icon.
Manager Dashboard
The Device Manager includes the ability to display one or more dashboards with data widgets.
Click the Dashboard tab to display the default dashboard, then click the Add Widget icon to display the add widget panel.
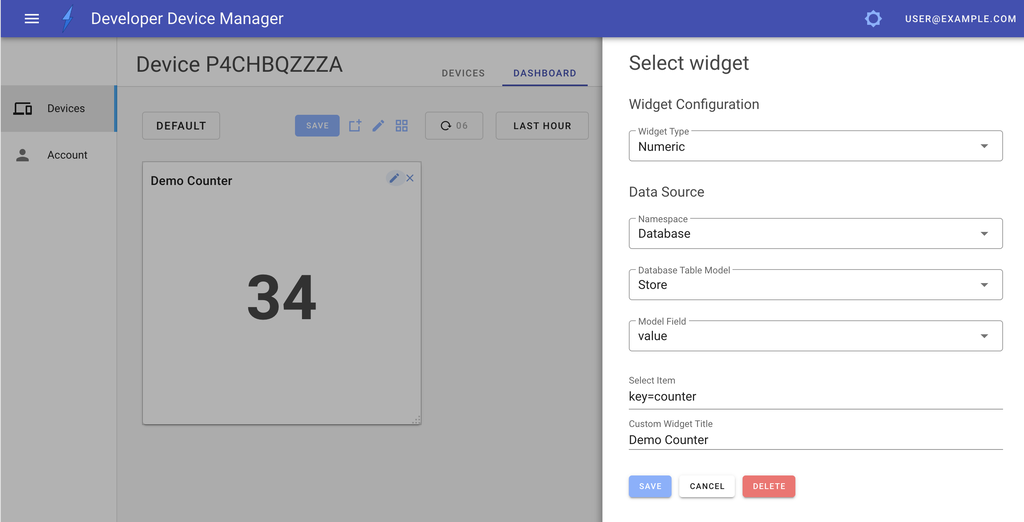
You can display database and metric data using numeric, gauge or graphical widgets.
To display the demo counter as a numberic from the database, enter the following widget configuration:
| Field | Value |
|---|---|
| Type | Numeric |
| Namespace | Database |
| Model | Store |
| Field | value |
| Select Item | key=counter |
This will select the Store table item that has a key value set to "counter" and display the "value" field.
After the ioto agent has run for a minute, there will be sufficient data points for a "COUNTER" metric to be created. Metrics permit the display of current and historical data using graphical widgets.
To display the demo counter as a graph using metrics, enter the following widget configuration:
| Field | Value |
|---|---|
| Type | Graph |
| Namespace | Embedthis/Device |
| Metric | COUNTER |
| Statistic | avg |
| Resource Dimensions | Device=YOUR-CLAIM-ID |
That should get you started with Ioto and posting data to the cloud from your device.
-end-