How to Use the Low-Code App Designer
Ioto provides a visual, low-code App Designer so you can create stunning mobile and desktop apps for your users, developers and support staff to manage devices and IoT services. Using the Ioto App Designer, you can visually design and create web-based device apps for desktop and mobile without requiring extensive front-end coding. With the Ioto App Designer, you can build modern, feature-rich device apps in less time and with less code.
This article provides a step-by-step guide to creating device apps when using the App Designer.
Read the Introduction to the Low-Code App Designer article for a background about the App Designer.
App Designer Process
The process of creating a device app has four main steps:
- Create a device app with the Builder
- Create pages and customize pages with the Page Designer
- Configure the app features with the Feature Designer
- Customize the app style with the Theme Editor
Create an App
The first step is to create an app using the Builder site by selecting the Apps option from the Builder sidebar menu and then clicking the Add button. This will open the app edit panel.
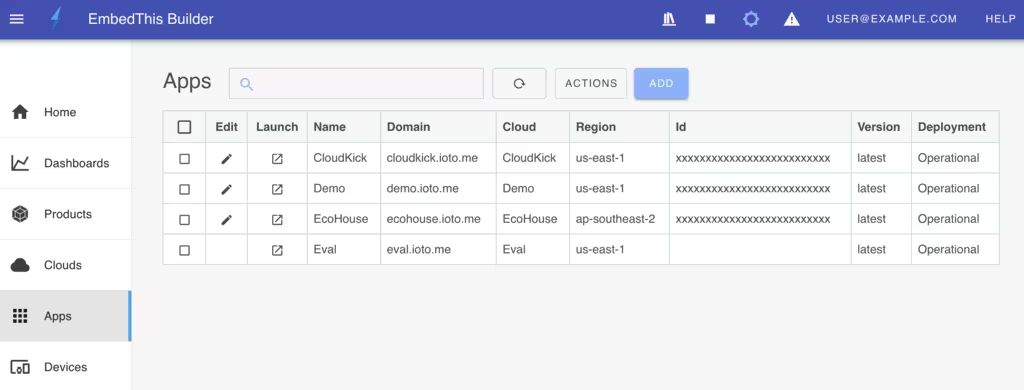
The app edit panel has the following fields:
- App name
- Device cloud region
- Web domain
- App owner
- App code base
- Upload for the display configuration
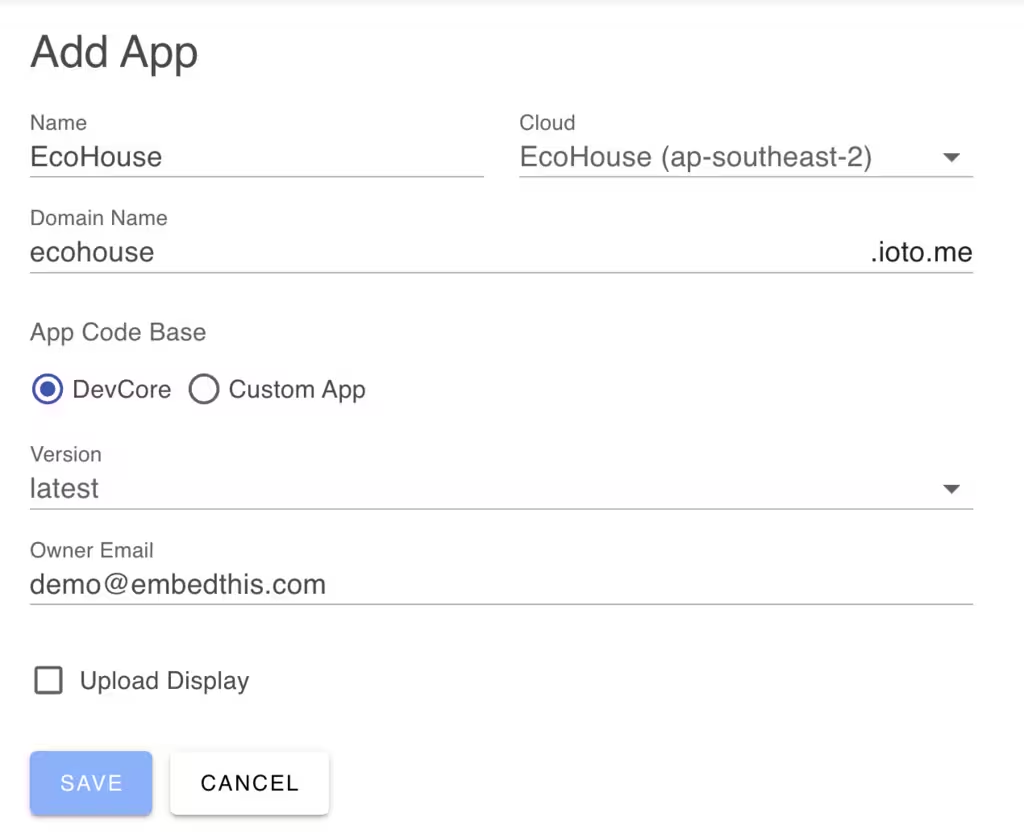
When you create an app, you specify the app name and the device cloud region to host the app. You also nominate the web domain for users to access the app. This is the URL that users will use to access the app.
You must define the login email address of the app owner/administrator. The app owner can invoke the App Designer within the device app to customize the app. Other users can view the app but not modify it.
Most apps use DevCore, a pre-configured UI framework designed for device management. It includes essential UI components and supports the low-code App Designer. However, if your app requires a custom UI framework or a unique architecture, you can upload your own code base instead.
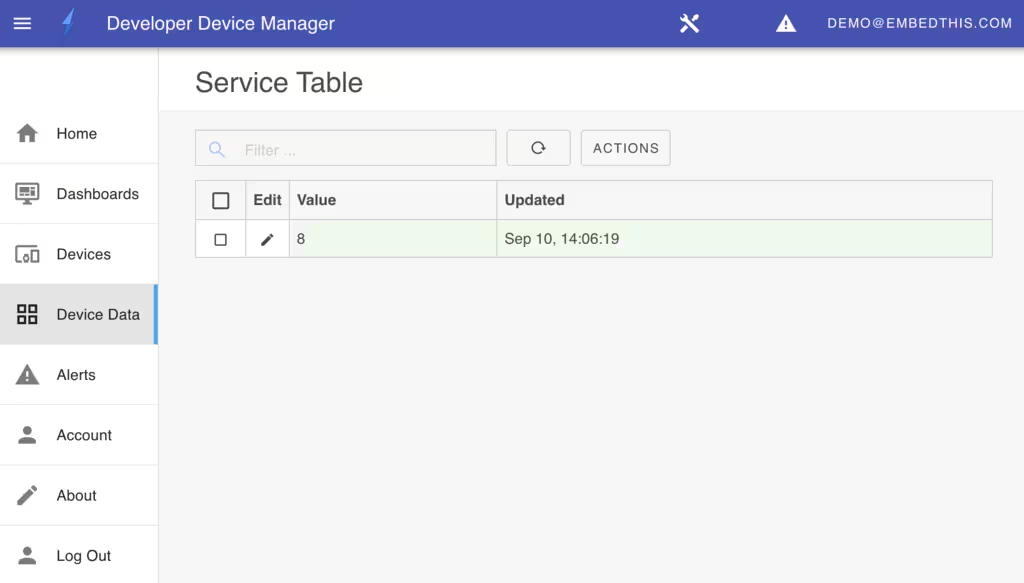
Once the app is created, you can launch the app by clicking the Launch button from the app list.
Launching the App
When you first create your app, the Builder configures it with a default theme and UI suitable for developing and testing your devices. With the App Designer, you can progressively modify, customize, and extend the app to fit your UI requirements.
App Designer
To run the App Designer, login to the device app using the app owner credentials that were specified when creating the app with the Builder. When launched, select the Designer menu option from the sidebar and select the Pages tab to display the list of pages in the app.
New apps start with default pages suitable for device testing. You can customize these by adding, modifying, or removing pages as needed.
For each page in the app, the list includes the page navigation path and menu details. The page path defines the app’s URL navigation path. The optional menu name and icon are used in sidebar navigation. The optional tab name is used to show sub-menu links to children pages via tabbed navigation at the top of the page.
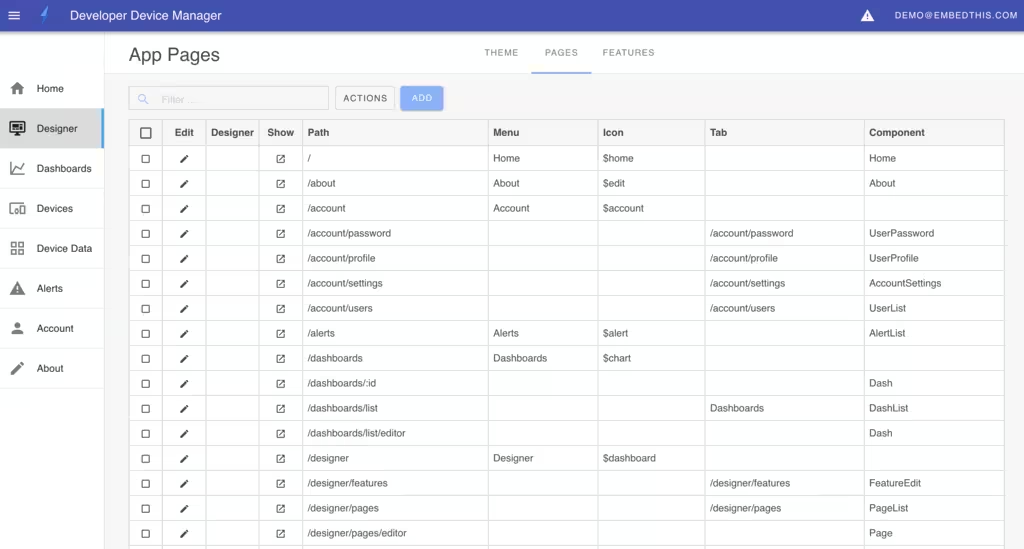
To create a new page in the app, click the Add button. To modify a page, click the edit icon on a page in the list.
Creating and Modifying Pages
For all pages, you can edit the page properties, to configure the page capabilities and how it is integrated into the app. The properties include:
- Page component and properties
- Page navigation path
- Page menu name and icon
- Required user role to access the page
- Whether the page has children pages that should be displayed as tabs under the parent page
Creating Pages
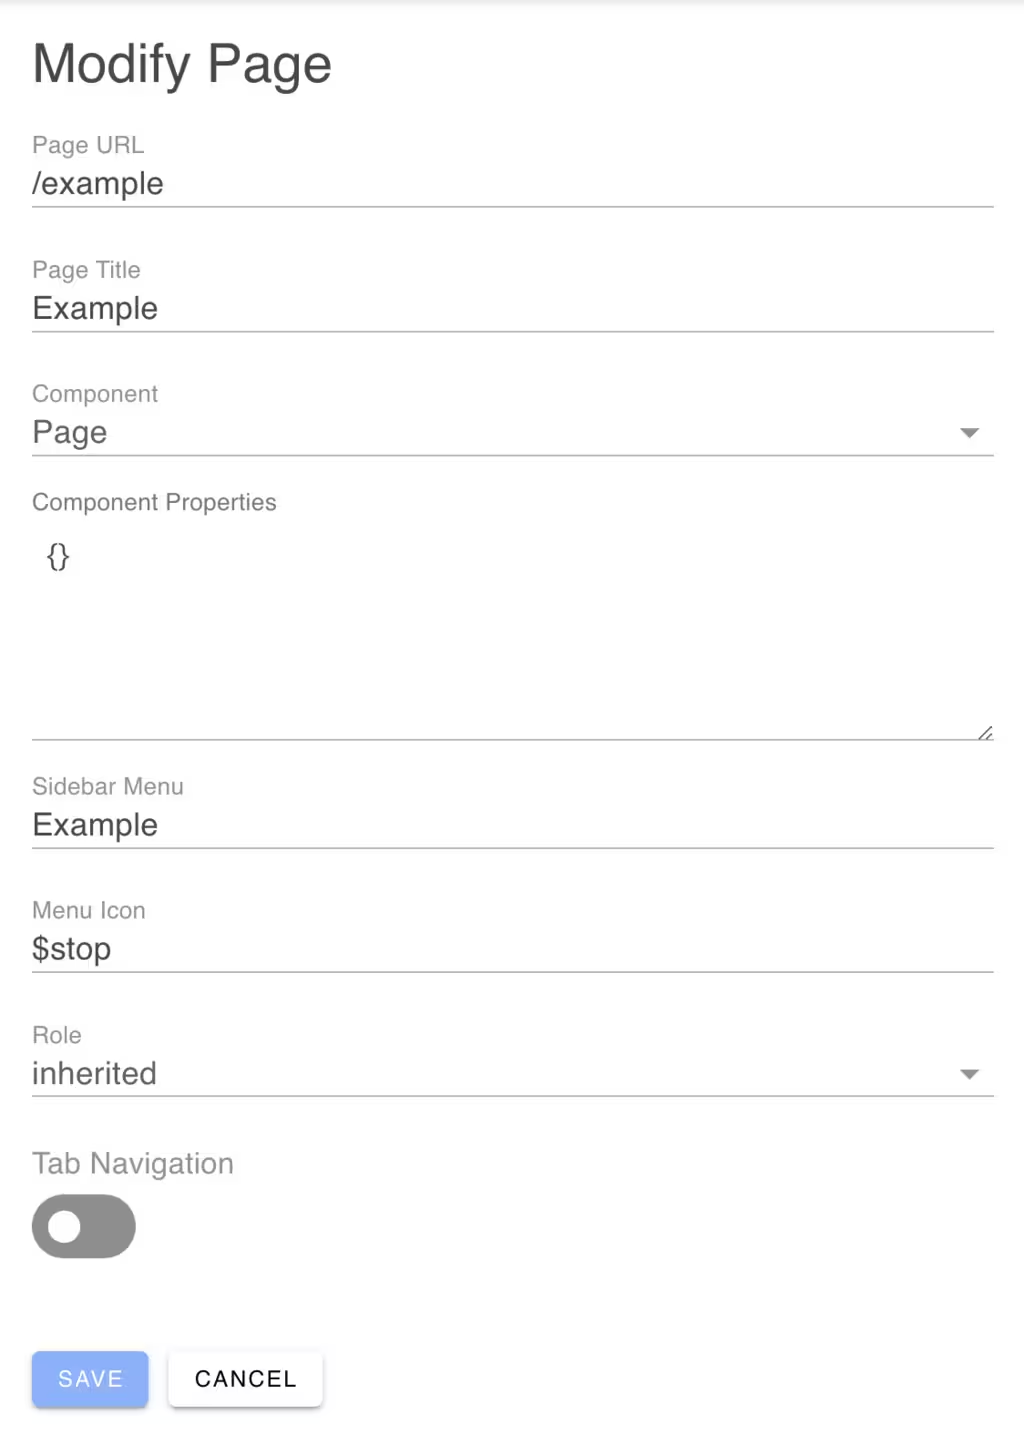
The page URL defines the browser URL used to access the page. The page title is used at the top of the page when displayed. If a menu option is supplied, the page will be added to the sidebar menu using the given menu text and menu icon.
Menu icons are optional and can be any icon from the Vuetify Material Design icon library.
The tab navigation switch controls whether the page has children pages that should be displayed as tabs under the parent page.
Access Roles
To secure a page, specify a role that the user must have in their role list. The supported roles are: owner, admin, user, public and inherted. If inherited is specified, the role is inherited from the parent page and defaults to user.
You can define or modify roles in a custom display.json5 file.
Page Designer
There are three types of pages in a device app:
- Pages that utilize the
Pagecomponent - Pages that utilize the
Dashboardcomponent - Pages that utilize other in-built or custom Vue components
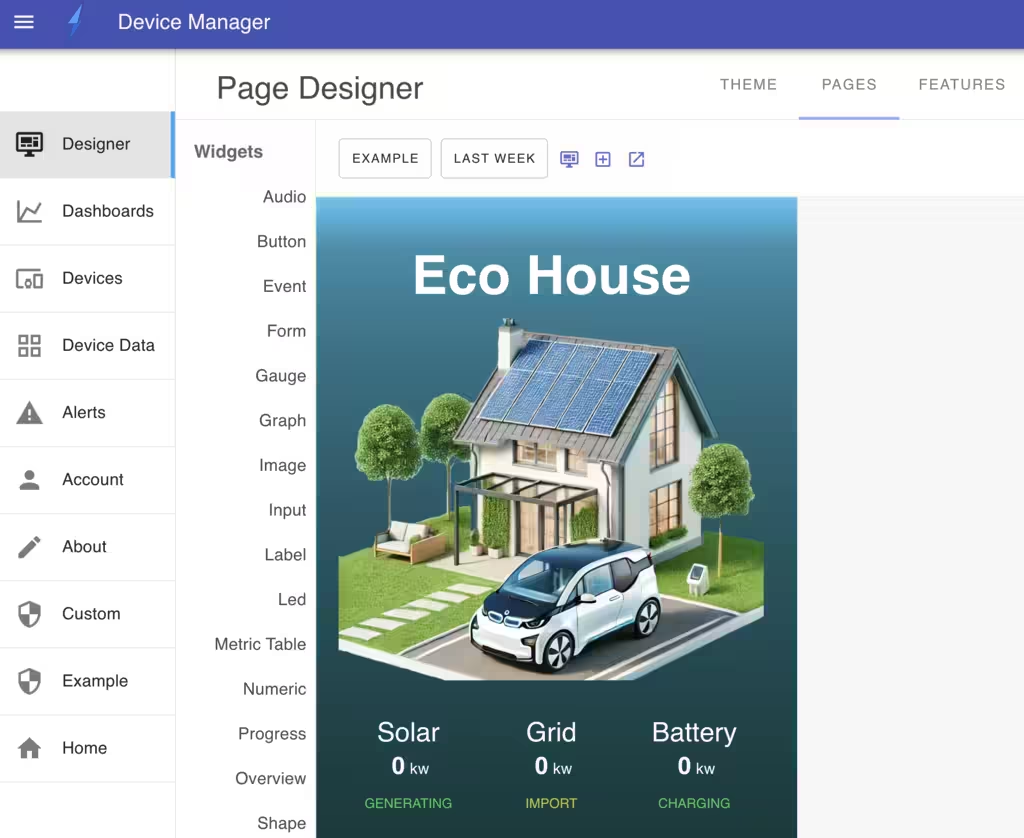
For pages that utilize the Page component, you can invoke the Page Designer to visually design the page by arranging widgets onto the page. The DevCore framework provides over 30 widgets to choose from.
The DevCore framework also provides a Dashboard facility that is used to display real-time device data. Dashboards work similarly to pages but allow device users to add and modify widgets. Pages, on the other hand, are designed to be fixed components of the app and are not modifiable by end-device users.

Designing Pages
Using the Page Designer, you can drag and drop widgets onto the page and customize their properties. The Widget sidebar offers over 30 widgets for displaying data, adding input controls, and automating actions. There are widgets for displaying text, images, charts, tables, forms, buttons, sliders, gauges, shapes, and more. By defining the page properties and arranging widgets, you can create a page for almost any UI appearance.
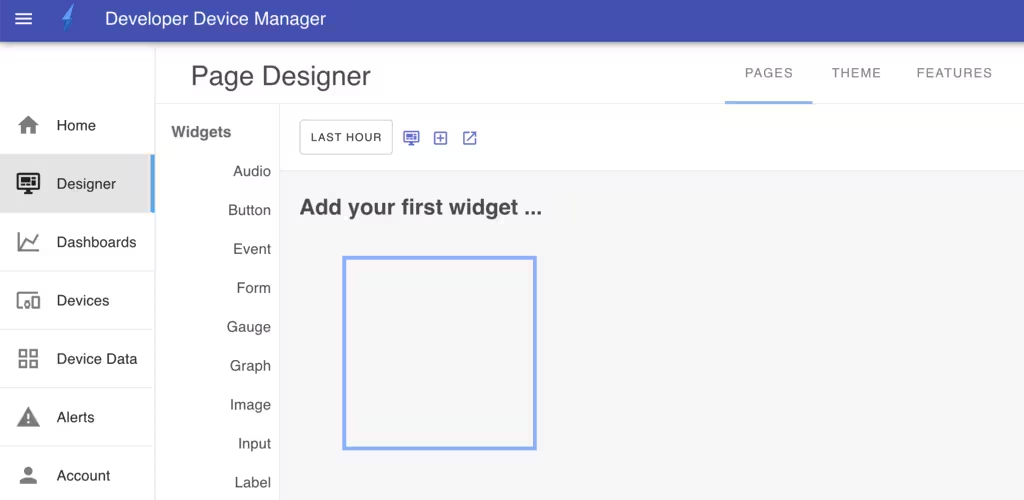
To drag a widget, select it from the Widget sidebar with your mouse-down and drag it onto the page at your desired position. At any time you can reposition or resize the widget using the mouse. This will then open the widget properties panel.
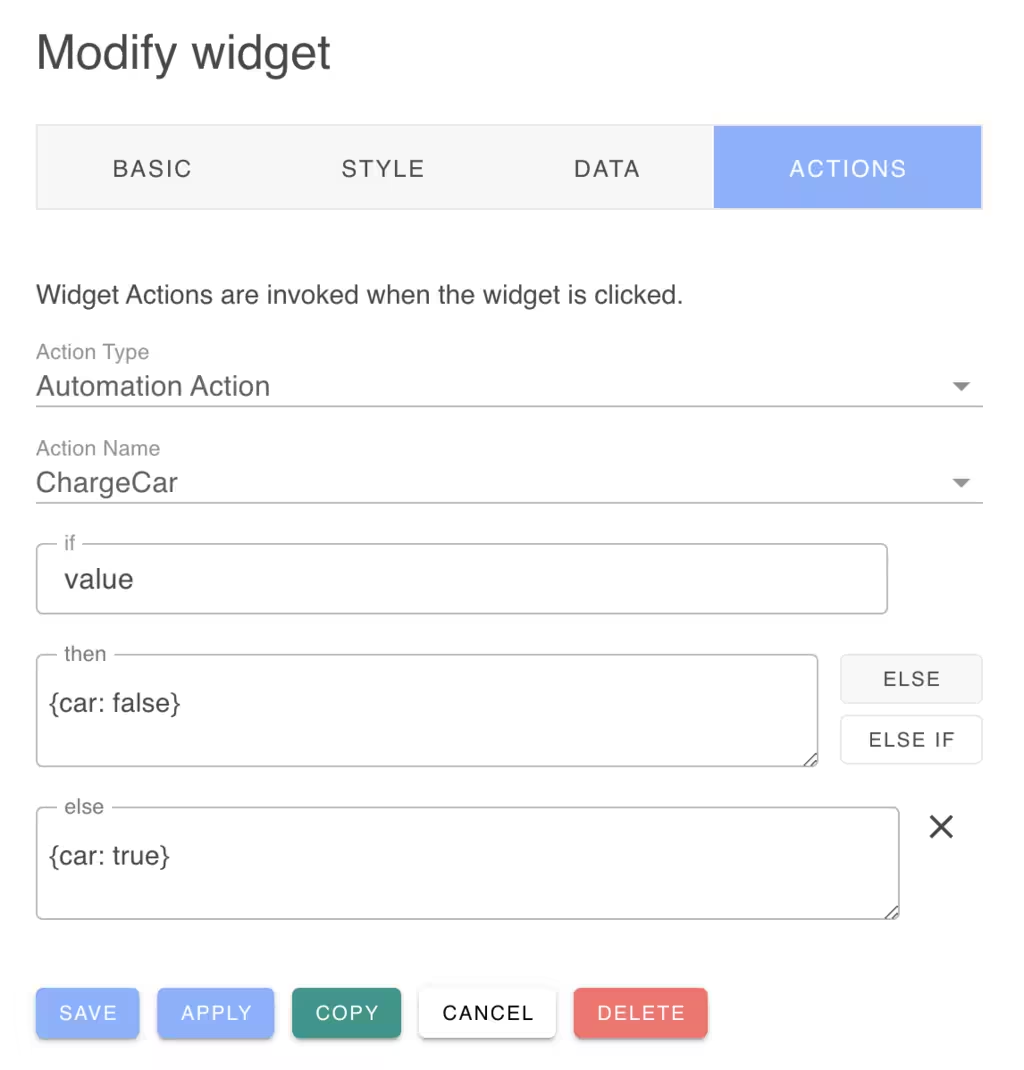
Each widget’s properties are grouped into the following tabs for easy customization:
- Basic
- Presentation
- Data
- Actions
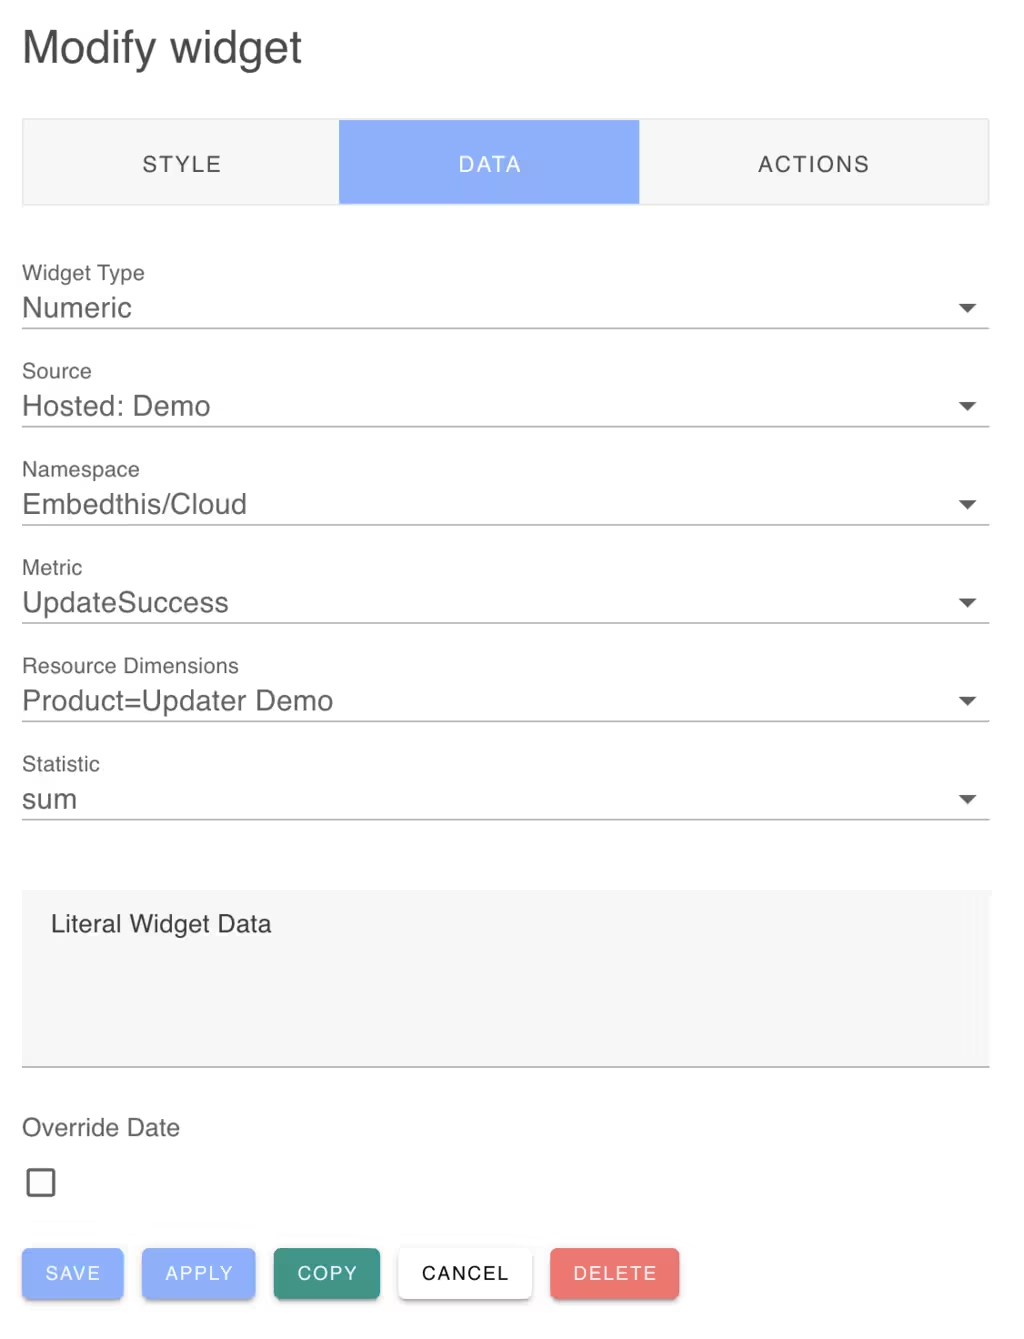
The basic tab defines the foundation widget properties. These include the widget type, title, header, footer, and max/min values.
The presentation tab defines the widget’s appearance. This includes the widget’s frame, and CSS properties to control background color, border, padding, and other visual properties. A show expression can be used to conditionally display the widget based on a boolean value.
The data tab defines the widget’s data source. Data can be sourced from the device database, device metrics or from the Ioto and Builder services.
The actions tab defines the automated actions to invoke when the widget is clicked or activated by the user. These include the actions that can be invoked by the widget, the action buttons and the input dialogs.
See the Widget Reference for more details on the widgets and their configuration.
Automations
You can connect widgets to cloud-side automations via the configuration in the data tab of the widget properties. Cloud-side automations can then be triggered by user-actions to run operations on the device or device cloud.
Theme editor
To configure the app theme, select the Theme menu option from the sidebar and select the Theme Editor tab.
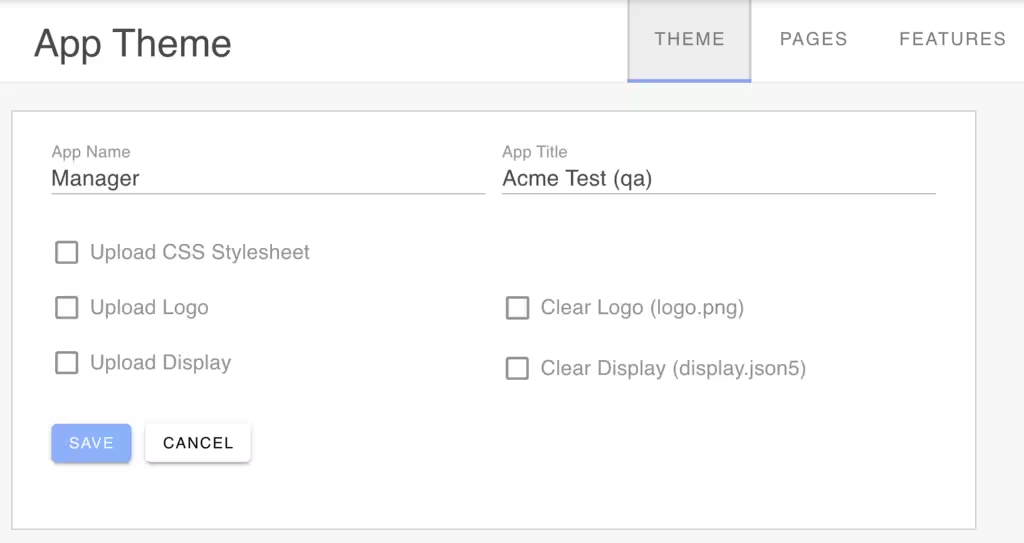
The theme editor allows you to configure the overall app theme by uploading a custom CSS style sheet that defines the app background color, font, and other theme properties. You can also upload a custom logo.
The App Designer saves the UI definition in a display.json5 file. This file can be exported, stored and imported as required.
For version control and deployment automation, you can export your UI configuration as a display.json5 file. This allows you to manually tweak settings beyond what the App Designer offers and store them in your source repository. You can then re-import the file for consistent UI configurations across multiple environments.
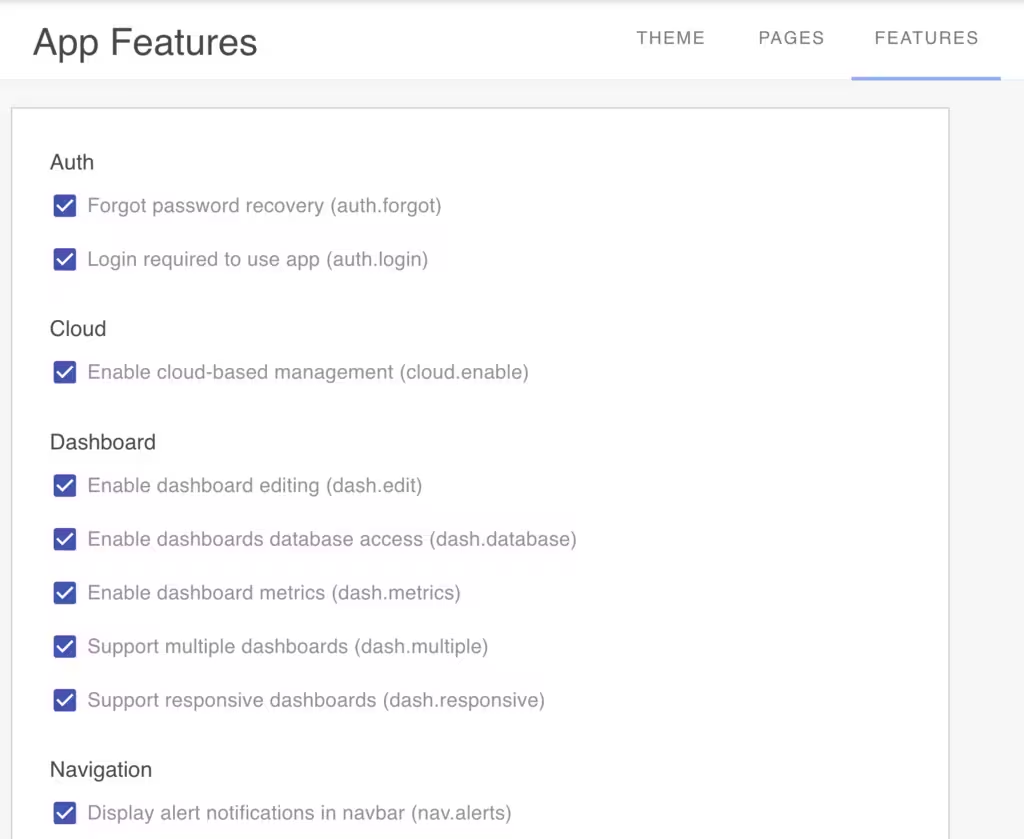
Feature designer
The feature designer allows you to configure the app features that are enabled for the app. For example, you can enable or disable user authentication, sidebar and other navigation features.
Exporting the App
For an infrastructure-as-code approach, you can export the app’s display configuration as a JSON file and store it in your source repository. This can then be uploaded to the Builder anytime you redeploy your app.
Conclusion
The Ioto Low-Code App Designer transforms embedded UI development—making it faster, easier, and more efficient. Engineers and IoT developers can focus on core functionalities while leveraging a powerful visual design tool.
Start building your next-generation IoT app today!
References
- Introduction to the Low-Code App Designer article for a background about the App Designer.
- App Designer Doc
{{comment.name}} said ...
{{comment.message}}